Connecting Channels
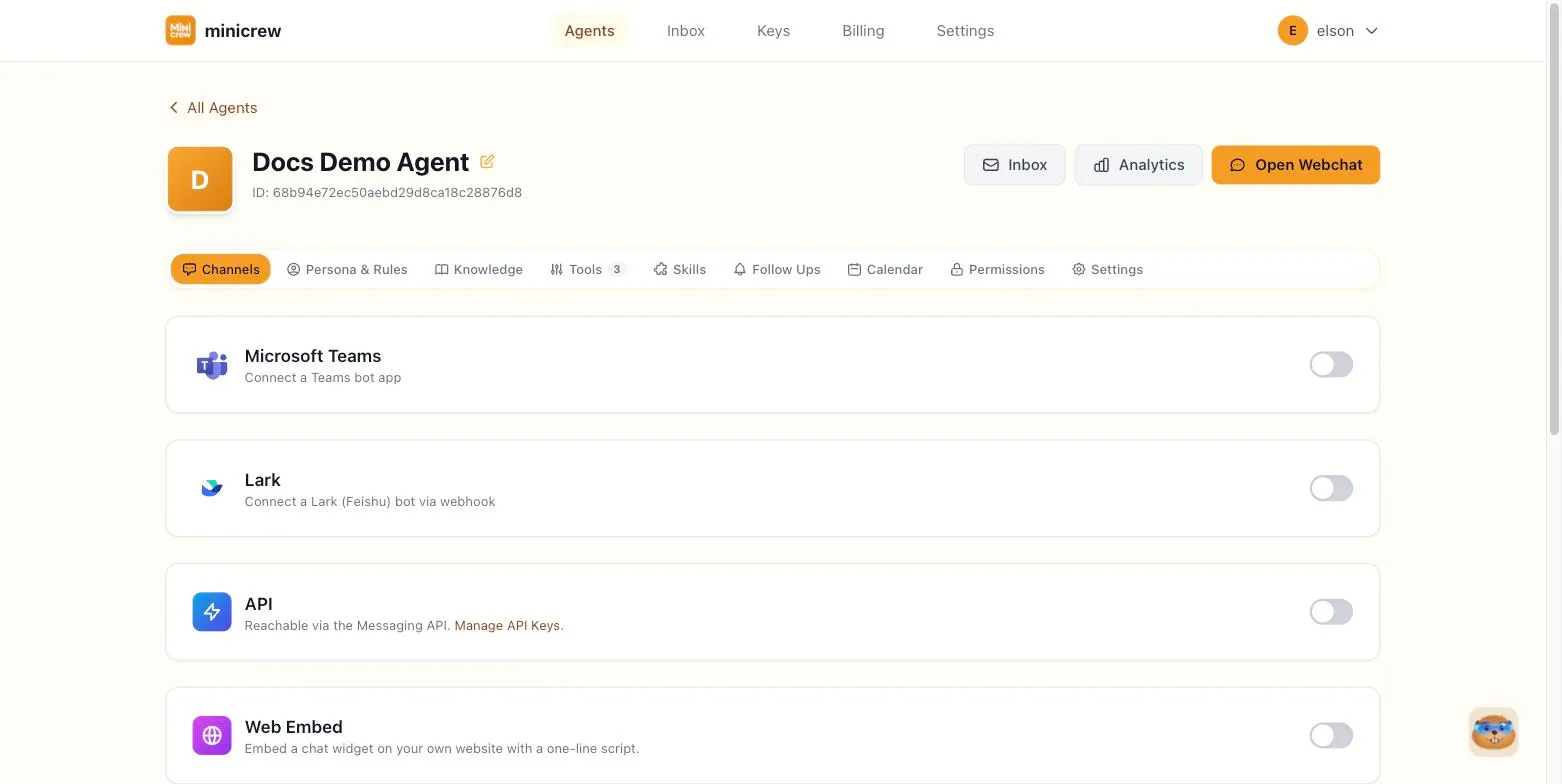
The Channels tab on an agent’s Configure page is where you connect the places customers can actually talk to your agent. Each channel is its own card. Click the card header (or the toggle) to expand it and reveal its setup fields.
- Toggle Slack on to expand the card.
- Copy the Webhook URL shown. You’ll paste this into your Slack App’s Event Subscriptions settings.
- Paste in your Slack App’s Bot Token (starts with
xoxb-) and Signing Secret, both found in your Slack App’s settings pages.
Microsoft Teams
Section titled “Microsoft Teams”- Toggle Microsoft Teams on.
- Copy the Messaging Endpoint URL and paste it into your Azure Bot registration.
- Fill in the App ID, App Password, and Tenant ID from your Azure Bot registration.
Telegram
Section titled “Telegram”- Toggle Telegram on.
- Paste the Bot Token you got from @BotFather on Telegram.
- Click Verify. Minicrew checks that the token is valid and automatically fills in the bot’s username.
Lark (Feishu)
Section titled “Lark (Feishu)”- Toggle Lark on.
- Copy the Event Request URL and paste it into your Lark Developer Console.
- Fill in the App ID, App Secret, and Verification Token from your Lark app’s settings.
WhatsApp works differently from the other channels. Numbers are connected once at the workspace level, and each agent then picks which connected numbers it should reply on.
- Toggle WhatsApp on for this agent.
- For each connected WhatsApp number you want this agent to handle, select it from the list.
- If more than one agent could share a number, set a trigger mode for that number: either Keyword (the agent only responds when a message contains one of the keywords you list) or Auto (the agent responds to everything on that number). Keyword mode is the default, so you don’t end up with multiple agents replying at once by accident.
Turning the WhatsApp toggle off for an agent stops it from reacting to that channel. It does not disconnect the underlying phone numbers, which stay connected at the workspace level and can be picked up by another agent.
Web Embed
Section titled “Web Embed”Web Embed lets you drop a chat widget on your own website with a single script tag. Setup is a short wizard:
- Appearance — pick a light or dark theme, and whether to show the Minicrew branding.
- Behavior & access — decide whether voice input and file attachments are allowed, and list the website domains allowed to load the widget (required before you can generate an install key).
- Install — Minicrew generates a public widget key and gives you a one-line script snippet to paste into your site’s HTML.
You can come back to this wizard any time to rotate the widget key or update the allowed domains.
Messaging API
Section titled “Messaging API”The API channel is how your agent connects to Minicrew’s public Messaging API. It’s useful for custom integrations, your own app, or connecting a channel that doesn’t have a dedicated card.
Toggling it on reveals:
- The agent’s bot_id, with a copy button — you’ll need this for API calls.
- A link to the full API Documentation page for this agent.
- A link to manage your workspace’s API Keys.
Which channel for which agent
Section titled “Which channel for which agent”A customer-facing business agent usually lives on WhatsApp, Slack, or Teams, wherever your customers already are, plus Web Embed if you want a chat bubble on your own site. A personal assistant agent, the kind that just helps you or a small team, often only needs Telegram or a single WhatsApp number, since nobody outside the team needs to find it. The API channel is for both: it’s how a developer wires the agent into something custom, whether that’s a business’s own app or your personal automation.
After connecting
Section titled “After connecting”Once a channel is connected, head to Permissions to control when the agent should reply in a group chat (every message vs. only when mentioned), and check Settings for channel-related toggles like knowing the customer’s phone number over the API channel.